End-to-end React apps testing made easy with Puppeteer
How to do E2E testing for React apps by using Puppeteer


Testing is mandatory in software development, and many possible tools exist for that task. This article will explore how Puppeteer makes automated testing simple and effective and will teach you how to write simple, efficient E2E tests for your React applications and how to use Puppeteer to carry out tests from a user’s perspective.

Discover how at OpenReplay.com.
Software testing is an important aspect of the software development life cycle (SDLC). It is imperative to test your applications as doing so helps you identify bugs and defects early with the written code and allows you to build quality and standard software that works as expected.
However, many organizations still rely heavily on inefficient manual testing methods. The statistics make a compelling case for implementing more automated testing. Research indicates that 56% of defects are discovered via in-house testing, yet only 5% of companies carry out fully automated testing. Two-thirds conduct tests in a 75:25 (manual:automation) ratio or 50:50.
As the software testing market is projected to grow at a 7% CAGR between 2021-2026, test automation is key to keeping up. A research found that 79% of end users still encountered bugs in 2019, showing the need for better testing. With 70% of IT leaders affirming that automated testing leads to greater efficiency, the trend toward automation is only increasing. Solutions like Puppeteer enable streamlined end-to-end (E2E) testing that can help organizations and companies improve software quality and user experiences.
Let’s dive right in 🚀
What is Puppeteer?
Puppeteer is a Node.js library developed by Google that automates the process of front-end testing. It provides high-level API to control Chrome or Chromium-based browsers over the DevTools Protocol. It allows testers to carry out headless as well as headful actions.
Headless vs. Headful Browsers Actions
A headless browser is a browser without a graphical user interface (GUI). They are executed via a command-line interface or using network communication. - WikiPedia
Puppeteer allows controlling Chrome or Chromium in a headless mode, where the browser user interface is not displayed, or in a headful mode, where the browser UI is shown. Although the headless mode is the default, a headful mode can be useful for debugging. Websites also find it more difficult to detect headful mode browsers controlled by scripts as bots compared to headless mode browsers.
Puppeteer finds application in:
- Automating most UI tests, including keyboard and mouse movements
- Performing end-to-end testing
- Web page crawling and scraping
- Generating screenshots and PDFs
- Capturing a timeline trace of your site to help diagnose performance issues
- Automating form submission
What is Jest?
Jest is an open-source JavaScript testing framework designed to test React and React Native web applications.
Usually, E2E tests on the front end of software are too cumbersome due to the required extensive, time-consuming configuration. However, testing with Jest reduces the complexities of front-end testing by minimizing the configuration required for unit tests.
Setting Up Your Project
In this section, you will configure a React application with Puppeteer and Jest. You will start by bootstrapping a new React application with CRA (Create React App).
Run the following commands:
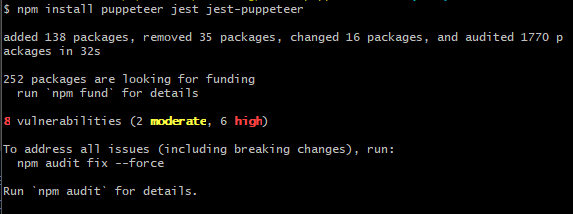
npx create-react-app react-puppeteer-testNext, once the project directory and your react-puppeteer-test application have been created, navigate to the newly created directory and run the command below in your terminal to install the following packages:
- Jest - Our test runner
- Puppeteer - Our browser automation tool
- Jest-Puppeteer - A Jest plugin to run Puppeteer tests
npm install puppeteer jest jest-puppeteerOnce your app is set up, run the application by entering either of these commands in your terminal:
yarn startOr using npm:
npm startYour server should launch in your browser at http://localhost:3000/, as shown below:
Configuring Jest Settings
Jest, by default, works great, but sometimes you just need more configuration power. To start, set up the Jest configuration by creating a file named jest.config.js in your project’s root directory. Populate the file with the following code snippet:
module.exports = {
  preset: "jest-puppeteer",
  testMatch: ["**/src/__tests__/**/*.test.js"],
  verbose: true,
};
This configuration instructs Jest to utilize the jest-puppeteer preset and locate tests within the __tests__ folder.
Add a corresponding script to the package.json file:
"scripts": {
  "test": "jest"
}
This command instructs Jest to handle the test script. You have successfully configured Jest in your application.
Configure Puppeteer Settings
Next, create a file named jest-puppeteer.config.js in your project’s root folder and paste the following snippet to create the Puppeteer configuration:
module.exports = {
  launch: {
    headless: process.env.HEADLESS !== "false",
    slowMo: process.env.SLOWMO ? parseInt(process.env.SLOWMO, 10) : 0,
    devtools: process.env.DEVTOOLS === "true",
    product: "chrome",
    args: [
      "--no-sandbox",
      "--disable-setuid-sandbox",
      "--disable-dev-shm-usage",
      "--disable-accelerated-2d-canvas",
      "--disable-gpu",
      "--window-size=1920,1080",
    ],
  },
};
This configuration specifies running Puppeteer in headless mode, avoiding sandbox usage, disabling GPU, and setting the window size. It also allows customization of the browser product (Chrome or Firefox) and introduces the option to slow down test execution for better visibility.
Examples Tests with Puppeteer
For a basic test using Puppeteer and Jest, consider the following example using the OpenReplay website homepage.
In this tutorial, I will walk you through carrying out your first automated test using Puppeteer. If you read this section, you have installed and set up Puppeteer in your project. If you have not, please follow the instructions above. If you have, let’s dive in.
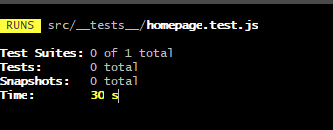
- Create your test files: You must create your actual test file to carry out your test. You must properly structure your test file in some directories to do that. Run the following command in your terminal:
cd src && mkdir __tests__ && cd __tests__ && touch homepage.test.jsWhat the above command does is:
- Change the directory into the
srcfolder; - Change the directory into the
__tests__folder; - Create a new file named
homepage.test.js
// src/__tests__/homepage.test.js
const puppeteer = require("puppeteer");

describe("OpenReplay.com page", () => {
  let browser;
  let page;

  beforeAll(async () => {
    browser = await puppeteer.launch();
    page = await browser.newPage();
  });

  it("should contain text", async () => {
    await page.goto("https://openreplay.com/", { waitUntil: 'networkidle2' });
    await page.waitForSelector(".display-4");
    const text = await page.$eval(".display-4", (e) => e.textContent);
    expect(text).toContain(`Session replay`);
  });

  afterAll(() => browser.close());
});
What this code above ⬆ does is:
- You started by describing your E2E test
- You navigate to the OpenReplay website
- You are testing that the class
display-4contains the textSession replayon the website. ThebeforeAllfunction initiates a Puppeteer instance, creating a browser and a page. The test checks for the presence of the specified text using the page’s selector.
This serves as a template for creating custom tests. Now, let’s explore a practical scenario.
Real-World Example: Testing a Login Form
Consider a login form component:
// App.js
import { useState } from "react";

import "./App.css";

function App() {
  const [isUserLoggedIn, setIsUserLoggedIn] = useState(false);
  const [error, setError] = useState(false);
  const [email, setEmail] = useState("");
  const [password, setPassword] = useState("");

  const login = (event) => {
    event.preventDefault();

    if (email === "admin@openreplay.com" && password === "password") {
      setIsUserLoggedIn(true);
    } else {
      setIsUserLoggedIn(false);
      setError(true);

      setTimeout(() => {
        setError(false);
      }, 4000);
    }
  };

  return (
    <div className="App">
      <div className="form-wrapper">
        <h1 className="form-header">Welcome back</h1>

        {!isUserLoggedIn && (
          <form className="form" onSubmit={login}>
            {error && (
              <p className="form-error-text">
                Invalid email or password
              </p>
            )}

            <input
              type="email"
              required
              placeholder="Email Address"
              className="form-input form-input__email"
              onChange={(e) => {
                setEmail(e.target.value);
              }}
              name="emailAddress"
            />
            <input
              type="password"
              required
              placeholder="Password"
              className="form-input form-input__password"
              onChange={(e) => {
                setPassword(e.target.value);
              }}
              name="password"
            />

            <button type="submit" className="form-submit-button">
              Submit
            </button>
          </form>
        )}

        {isUserLoggedIn && (
          <p className="form-success-message">Login successful.</p>
        )}
      </div>
    </div>
  );
}

export default App;
In the code above, we are emulating a login scenario where:
- We initialized state variables
isUserLoggedIn,error,email, andpasswordusing theuseStatehook. - The
loginfunction handles form submission, checking credentials, and updating state accordingly. - JSX renders a form with email, password inputs, and a submit button based on the user’s login status.
- An error message is displayed if the login attempt fails, disappearing after 4 seconds.
- Login only succeeds if the username is
admin@openreplay.comand the password ispassword - A success message is displayed when the user is logged in.
- The component is exported as the default export for use in other parts of the application.
// App.test.js
import puppeteer from "puppeteer";

describe("App.js", () => {
  let browser;
  let page;

  beforeAll(async () => {
    browser = await puppeteer.launch();
    page = await browser.newPage();
  });

  it("shows a success message after submitting a form", async () => {
    await page.goto("http://localhost:5000");
    await page.waitForSelector(".form-header");

    await page.click(".form-input__email");
    await page.type(".form-input__email", "admin@openreplay.com");

    await page.click(".form-input__password");
    await page.type(".form-input__password", "password");

    await page.click(".form-submit-button");

    await page.waitForSelector(".form-success-message");
    const text = await page.$eval(
      ".form-success-message",
      (e) => e.textContent
    );

    expect(text).toContain("Login successful.");
  });

  it("shows an error message if authentication fails", async () => {
    await page.goto("http://localhost:5000");
    await page.waitForSelector(".form-header");

    await page.click(".form-input__email");
    await page.type(".form-input__email", "admin@openreplay.com");

    await page.click(".form-input__password");
    await page.type(".form-input__password", "password123");

    await page.click(".form-submit-button");

    await page.waitForSelector(".form-error-text");
    const text = await page.$eval(".form-error-text", (e) => e.textContent);

    expect(text).toContain("Invalid email or password");
  });

  afterAll(() => browser.close());
});
This test example above ⬆ demonstrates testing a login form with Puppeteer and Jest. It covers navigating to the application, interacting with form elements, and verifying the expected outcomes.
- It includes setup code in a
beforeAllblock, launching a Puppeteer browser instance, and creating a new page before any test. - The first test (
it) checks if a success message (Login successful.) is displayed after submitting the form with valid credentials. - In the first test, the form is interacted with by navigating to the specified URL, filling in the email and password fields, clicking the submit button, and then validating the presence of a success message.
- The second test checks if an error message is displayed when attempting to authenticate with invalid credentials.
- Similar to the first test, the second test interacts with the form by navigating to the URL, inputting an invalid email and password, clicking the submit button, and validating the presence of an error message (
Invalid email or password). - A
afterAllblock ensures that the Puppeteer browser instance is closed after completing all tests.
Exploring Puppeteer’s Debugging Features
Puppeteer offers a variety of debugging options that can be utilized for end-to-end testing of React applications. Let’s explore these options and demonstrate how to incorporate them into an existing test.
Running in Headless Mode
By default, Puppeteer launches the Chromium browser in headless mode, which means there’s no visible UI. This is ideal for automated testing and server environments. However, if you want to observe the browser during the test execution, you can launch the full version of the browser by setting headless: false:
beforeAll(async () => {
  browser = await puppeteer.launch({ headless: false });
  page = await browser.newPage();
});
When you run the test, a Chromium browser window will be visible.
Slowing Down Test Execution
Some actions, like form submissions, may happen too quickly to observe in headless mode. To address this, Puppeteer provides the slowMo option, which delays Puppeteer executions.
For example, slowing down by 300 milliseconds can be achieved as follows:
beforeAll(async () => {
  browser = await puppeteer.launch({
    headless: false,
    slowMo: 300, // slow down by 300ms
  });
  page = await browser.newPage();
});
This allows you to better follow the test execution.
Emulating Devices with page.emulate
The page.emulate() method enables the emulation of device metrics and user agents. You can customize properties such as viewport dimensions and user agent:
beforeAll(async () => {
  browser = await puppeteer.launch({ headless: false });
  page = await browser.newPage();

  page.emulate({
    viewport: {
      width: 500,
      height: 900,
    },
    userAgent: 'Mozilla/5.0 (Macintosh; Intel Mac OS X 11_4) AppleWebKit/537.36 (KHTML, like Gecko) Chrome/91.0.4472.114 Safari/537.36',
    deviceScaleFactor: 1,
    isMobile: false,
    hasTouch: false,
    isLandscape: false,
  });
});
Puppeteer provides a list of device descriptors for simplified emulation, accessible via puppeteer.devices. For example, emulating an iPhone 7:
const iPhone = puppeteer.devices['iPhone 7'];

beforeAll(async () => {
  browser = await puppeteer.launch({
    headless: false,
    slowMo: 300, // slow down by 300ms
  });
  page = await browser.newPage();

  await page.emulate(iPhone);
});
Using Jest Puppeteer
Jest Puppeteer streamlines the configuration for running Puppeteer tests. Follow these steps to set it up:
Install Jest Puppeteer with yarn add -D jest-puppeteer.
Create a jest.config.js file:
module.exports = {
  preset: "jest-puppeteer",
  testRegex: "./*\\e2e\\.test\\.js$",
};
Create a jest-puppeteer.config.js file:
module.exports = {
  server: {
    command: "yarn start",
    port: 3000,
    launchTimeout: 10000,
    debug: true,
  },
};
Jest Puppeteer eliminates the need to build the site for production before testing and simplifies the testing process.
Jest Puppeteer in Action
Modify your test file (e.g., e2e.test.js) to take advantage of Jest Puppeteer features:
// ... (existing setup)
describe("App.js", () => {
  it("shows a success message after submitting a form", async () => {
    // ... (existing test logic)
  });

  it("shows an error message if authentication fails", async () => {
    // ... (existing test logic)
  });
});
Jest Puppeteer minimizes the setup and provides a cleaner syntax for form filling, button clicking, and text matching.
Before running the test, update the form in App.js to include name attributes for email and password inputs.
<input
  type="email"
  required
  placeholder="Email Address"
  className="form-input form-input__email"
  onChange={(e) => {
    setEmail(e.target.value);
  }}
  name="emailAddress"
/>

<input
  type="password"
  required
  placeholder="Password"
  className="form-input form-input__password"
  onChange={(e) => {
    setPassword(e.target.value);
  }}
  name="password"
Ensure ESLint compatibility by updating the .eslintrc.js file:
module.exports = {
env: {
jest: true,
},
globals: {
page: true,
browser: true,
context: true,
jestPuppeteer: true,
},
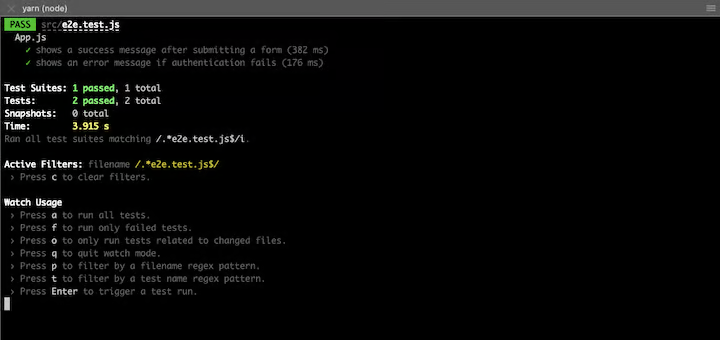
};Execute the test with yarn test:e2e for a concise output with all tests passed.
By incorporating these Puppeteer debugging options and leveraging Jest Puppeteer, you can streamline the testing process and ensure robust end-to-end testing for your React applications.
Conclusion
This article provided insights into using Puppeteer with Jest for end-to-end testing. The real-world example showcased testing a login form, emphasizing navigation, element identification, and user action simulation. Incorporate these principles into your testing workflow for robust React app testing.
Checkout the repository for this article on https://github.com/Eunit99/react-puppeteer-test
Further Readings
- Playwright Vs. Puppeteer: Which To Choose?
- Testing With Playwright: A Tutorial Guide With Examples
- End-To-End Testing: Unleash The Power Of WebDriverIO
- Optimizing Web Performance With Advanced Techniques
Gain control over your UX
See how users are using your site as if you were sitting next to them, learn and iterate faster with OpenReplay — the open-source session replay tool for developers. Self-host it in minutes, and have complete control over your customer data.
Star on GitHub12k